Tuesday, December 15, 2009
Using GSON to parse Yelp JSON result
This is a very basic example about using GSON to parse JSON result from Yelp. These few lines of codes will do the trick:
Monday, December 14, 2009
Sunday, December 13, 2009
Getting current GPS coordinates in Android
All you need are these few lines of codes:
Also don't forget to add this permission in the manifest file:
<uses-permission android:name="android.permission.ACCESS_FINE_LOCATION"></uses-permission>
<uses-permission android:name="android.permission.ACCESS_FINE_LOCATION"></uses-permission>
Friday, November 27, 2009
Nonblocking mechanism for Android GUI
Do you realize that fetching data from the web, for example a GET request, may actually block the GUI and then creates an error? I experienced that and would want to share my thoughts on resolving it. I have not implemented a sound solution but these are the things I have in my mind. There are two components to implement in the code:
1. Thread
2. Handler
Let's see if this works :)
1. Thread
2. Handler
Let's see if this works :)
Wednesday, November 25, 2009
Developers are born brave
This is something motivational I want to share with the readers :)
Credits to the creative artist.

Credits to the creative artist.

Saturday, November 21, 2009
Removing status and title bars in an Android app (suggested method)
I discovered that the status and title bars can be removed in an Android app by inserting one simple line in the manifest xml file. Feel free to try this out and let's discuss if this does not work for you.
<activity android:name=".YOUR_ACTIVITY_NAME"
android:label="@string/app_name"
android:screenOrientation="portrait"
android:theme="@android:style/Theme.Black.NoTitleBar.Fullscreen">
<intent-filter>
<action android:name="android.intent.action.MAIN" />
<category android:name="android.intent.category.LAUNCHER" />
</intent-filter>
</activity>

Thursday, November 19, 2009
Distinct intersecting values of two arrays
I have written two different methods that gives the same output. The output is a list of distinct intersecting values of two arrays. I am amazed with the different amount of time taken to solve this problem. It would be something interesting to investigate. Here are the suggested solutions:
import java.util.ArrayList;The output of these methods are as below (I'm telling you, you'll be amazed looking at the time taken for each method):
import java.util.HashSet;
import java.util.Set;
public class ArraysIntersection {
private void findIntersectionMethod1(int[] a, int[] b){
long start = System.nanoTime();
int indexA = 0;
int indexB = 0;
ArrayListunique = new ArrayList ();
while (indexA < a.length && indexB < b.length) {
if (a[indexA] == b[indexB]) {
if (!unique.contains(a[indexA])) {
unique.add(a[indexA]);
}
indexA++;
indexB++;
} else if (a[indexA] < b[indexB]) {
indexA++;
} else {
indexB++;
}
}
long elapsed = (System.nanoTime() - start);
System.out.println("Elapsed time (findIntersectionMethod1): " + elapsed + "ns");
System.out.println("Intersection of elements: " + unique);
}
private void findIntersectionMethod2(int[] arr1, int[] arr2){
long start = System.nanoTime();
ArrayListunique = new ArrayList ();
for (int i = 0; i < arr1.length; i++) {
for (int j = 0; j < arr2.length; j++) {
if (arr1[i] == arr2[j]) {
if (!unique.contains(arr1[i])) {
unique.add(arr1[i]);
}
}
}
}
long elapsed = (System.nanoTime() - start);
System.out.println("Elapsed time (findIntersectionMethod2): " + elapsed + "ns");
System.out.println("Intersection of elements: " + unique);
}
private void findIntersectionMethod3(int[] a, int[] b){
long start = System.nanoTime();
Setunique = new HashSet ();
int indexA = 0;
int indexB = 0;
while (indexA < a.length && indexB < b.length) {
if (a[indexA] == b[indexB]) {
unique.add(a[indexA]);
indexA++;
indexB++;
} else if (a[indexA] < b[indexB]) {
indexA++;
} else {
indexB++;
}
}
long elapsed = (System.nanoTime() - start);
System.out.println("Elapsed time (findIntersectionMethod3): " + elapsed + "ns");
System.out.println("Intersection of elements: " + unique);
}
public static void main(String[] args) {
int a[]={1, 1, 2, 4, 4, 7, 8, 8, 9, 14, 14, 20, 20, 20};
int b[]={1, 1, 1, 2, 2, 8, 8, 20};
ArraysIntersection arrIntersect = new ArraysIntersection();
arrIntersect.findIntersectionMethod1(a, b);
arrIntersect.findIntersectionMethod2(a, b);
arrIntersect.findIntersectionMethod3(a, b);
}
}
Elapsed time (findIntersectionMethod1): 455000nsI'm sure there are much better solutions to solve this interesting problem that I have not thought of.
Intersection of elements: [1, 2, 8, 20]
Elapsed time (findIntersectionMethod2): 15000ns
Intersection of elements: [1, 2, 8, 20]
Elapsed time (findIntersectionMethod3): 65000ns
Intersection of elements: [2, 8, 1, 20]
Wednesday, November 18, 2009
Quizzie with improved user interface
This is Quizzie v1.1 with much better user interface. I hope you enjoy watching this video. Quizzie v1.0 is available here.
Remote log management and monitoring? There's an Android app for that
I'm thinking of writing an Android app using Splunk's API. Not sure if it's possible but I think it can be done. Here is my concept about the application.
We can actually see the outputs of the activities in Android by using adb logcat. What if I am able to pipe out the stream into a file and then push it to my local Splunk web server. hhhmmm interesting ...
"Remote log management and monitoring? There's an Android app for that"
:D
We can actually see the outputs of the activities in Android by using adb logcat. What if I am able to pipe out the stream into a file and then push it to my local Splunk web server. hhhmmm interesting ...
"Remote log management and monitoring? There's an Android app for that"
:D
Saturday, November 14, 2009
Jython in Android
I think it's possible. But why are there so limited references to use Jython in Android?
Friday, November 13, 2009
Removing status and title bars in an Android app
Here are a few options to display the status and title bars in your Android app. The first image shown below is exactly the output you are getting if you do not do any configurations.
To get this output, add this line in the onCreate method:
getWindow().setFlags(WindowManager.LayoutParams.FLAG_FULLSCREEN, WindowManager.LayoutParams.FLAG_FULLSCREEN);
To get this output, add this line in the onCreate method:
requestWindowFeature(Window.FEATURE_NO_TITLE);
To get this output, add these two lines in the onCreate method:
requestWindowFeature(Window.FEATURE_NO_TITLE);
getWindow().setFlags(WindowManager.LayoutParams.FLAG_FULLSCREEN, WindowManager.LayoutParams.FLAG_FULLSCREEN);

To get this output, add this line in the onCreate method:
getWindow().setFlags(WindowManager.LayoutParams.FLAG_FULLSCREEN, WindowManager.LayoutParams.FLAG_FULLSCREEN);

To get this output, add this line in the onCreate method:
requestWindowFeature(Window.FEATURE_NO_TITLE);

To get this output, add these two lines in the onCreate method:
requestWindowFeature(Window.FEATURE_NO_TITLE);
getWindow().setFlags(WindowManager.LayoutParams.FLAG_FULLSCREEN, WindowManager.LayoutParams.FLAG_FULLSCREEN);
Wednesday, November 11, 2009
The very music that reminds me to be innovative
I know this song is quite old but I have been listening to it ever since it was introduced to the public. This is "Here Comes Another Bubble" and it is adapted from "We Didn't Start The Fire". Being a software developer, I personally prefer the technical version of the song about coming up with innovative and brilliant ideas that change the world; not so much about the wars and scandals that took place throughout the course of history.
Monday, November 9, 2009
Java Codes in Python (Part 4)
Here is a suggested solution to get unique values from a list without using a map or set data structure
Extracting unique element(s) from a sorted list
PROBLEM: you have a list of sorted elements. All elements are sorted (it could be in ascending order or descending order). You are printing out the unique elements in the sorted list.
COMPLEXITY: O(n)
COMPLEXITY: O(n)
The output is shown below:
public class UniqueNumbers {
 public static void main(String[] args) {
  int a[]={1, 1, 1, 2, 4, 4, 7, 8, 9, 14, 14, 20, 20, 20};
  //int a[]={1};
  //int a[]={2, 2, 4, 5};
  //int a[]={1, 1, 1, 2, 2, 8};
  //int a[]={1, 1, 1};
  int uniq = a[a.length-1];
  boolean numberExists = false;
  for (int i = 0; i < a.length; i++) {
   if (a[i] == uniq) {
    if (!numberExists) {
     System.out.println("Position: " + i + " Unique Element => " + a[i]);
     numberExists = true;
    }
   }
   else {
    System.out.println("Position: " + i + " Unique Element => " + a[i]);
    uniq = a[i];
    numberExists = true;
   }
  }
 }
}
Update: my solution is not that elegant after all. I had the opportunity to discuss the algorithm with Mark and he has a much better way to solve this problem. Thank you, Mark (you know who you are :D).
{1, 1, 1, 2, 4, 4, 7, 8, 9, 14, 14, 20, 20, 20}
Position: 0 Unique Element => 1
Position: 3 Unique Element => 2
Position: 4 Unique Element => 4
Position: 6 Unique Element => 7
Position: 7 Unique Element => 8
Position: 8 Unique Element => 9
Position: 9 Unique Element => 14
Position: 11 Unique Element => 20

{1}
Position: 0 Unique Element => 1

{2, 2, 4, 5}
Position: 0 Unique Element => 2
Position: 2 Unique Element => 4
Position: 3 Unique Element => 5

{1, 1, 1, 2, 2, 8}
Position: 0 Unique Element => 1
Position: 3 Unique Element => 2
Position: 5 Unique Element => 8

{1, 1, 1}
Position: 0 Unique Element => 1
 public static void main(String[] args) {
  int a[]={1, 1, 1, 2, 4, 4, 7, 8, 9, 14, 14, 20, 20, 20};
  //int a[]={1};
  //int a[]={2, 2, 4, 5};
  //int a[]={1, 1, 1, 2, 2, 8};
  //int a[]={1, 1, 1};
  int uniq = a[0];
  System.out.println("Position: " + 0 + " Unique Element => " + uniq);
  for (int i = 1; i < a.length; i++) {
   if (a[i] != uniq) {
    System.out.println("Position: " + i + " Unique Element => " + a[i]);
    uniq = a[i];
   }
  }
 }
Saturday, November 7, 2009
Setting defined colors for your Android UI components
I don't think the Android SDK manual is helpful enough when it comes to setting the colors that you defined in the XML file (in my example, res -> values -> color.xml). There is actually a workaround instead of following rigidly the guidelines to use the setTextColor(int color) method.
I believe you must have read the guidelines how to set the color of TextView from this URL and this URL and do not really feel like constructing another XML file as mentioned in the manual.
I also believe that you must have used this approach to set the color from the Java code,
btnInstance.setTextColor(R.color.YOUR_DEFINED_COLOR);
simply because the setTextColor asks for an Integer as the parameter but you don't see the changes taking place.
SOLUTION: this is THE workaround to set the color of your UI components from the codes.
btnInstance.setTextColor(getResources().getColor(R.color.YOUR_DEFINED_COLOR));
The 12 balls puzzle
A solution to solve the 12 ball puzzle.
Fact: you know that 11 balls are equally weighted and 1 of them is not
Constraint: you can only use the weighing machine at most 3 times to determine the heaviest ball
Fact: you know that 11 balls are equally weighted and 1 of them is not
Constraint: you can only use the weighing machine at most 3 times to determine the heaviest ball
Update: Click here to view the solution to solve the 8 balls puzzle
import java.util.Random;

public class TheHeaviestBall {

 private int count = 0;
 private int indexHeaviestBall = 0;
 private Random myRand = new Random();
 private int[] balls = {1,1,1,1,1,1,1,1,1,1,1,1};
 private int[] arrangeBalls(){
  balls[myRand.nextInt(12)] = 2;
  for (int aBall : balls) {
   System.out.print(aBall + " ");
  }
  return balls;
 }

 public void weighingCount(){
  count++;
  if (count > 3) {
   System.out.println("Your algorithm fails");
  }
 }

 public int theBALL(){
  int myBalls[] = arrangeBalls();
  weighingCount();
  if ((myBalls[0]+myBalls[1]+myBalls[2]+myBalls[3]) > (myBalls[4]+myBalls[5]+myBalls[6]+myBalls[7])) {
   weighingCount();
   if ((myBalls[0]+myBalls[1]) > (myBalls[2]+myBalls[3])) {
    weighingCount();
    if (myBalls[0] > myBalls[1]) {
     indexHeaviestBall = 0;
     return myBalls[0];
    } else {
     indexHeaviestBall = 1;
     return myBalls[1];
    }
   } else {
    weighingCount();
    if (myBalls[2] > myBalls[3]) {
     indexHeaviestBall = 2;
     return myBalls[2];
    } else {
     indexHeaviestBall = 3;
     return myBalls[3];
    }
   }
  }
  else if ((myBalls[4]+myBalls[5]+myBalls[6]+myBalls[7]) > (myBalls[0]+myBalls[1]+myBalls[2]+myBalls[3])) {
   weighingCount();
   if ((myBalls[4]+myBalls[5]) > (myBalls[6]+myBalls[7])) {
    weighingCount();
    if (myBalls[4] > myBalls[5]) {
     indexHeaviestBall = 4;
     return myBalls[4];
    } else {
     indexHeaviestBall = 5;
     return myBalls[5];
    }
   } else {
    weighingCount();
    if (myBalls[6] > myBalls[7]) {
     indexHeaviestBall = 6;
     return myBalls[6];
    } else {
     indexHeaviestBall = 7;
     return myBalls[7];
    }
   }
  }
  else {
   weighingCount();
   if ((myBalls[8]+myBalls[9]) > (myBalls[10]+myBalls[11])) {
    weighingCount();
    if (myBalls[8] > myBalls[9]) {
     indexHeaviestBall = 8;
     return myBalls[8];
    } else {
     indexHeaviestBall = 9;
     return myBalls[9];
    }
   } else {
    weighingCount();
    if (myBalls[10] > myBalls[11]) {
     indexHeaviestBall = 10;
     return myBalls[10];
    } else {
     indexHeaviestBall = 11;
     return myBalls[11];
    }
   }
  }
 }

 public static void getMyHeaviestBall(){
  TheHeaviestBall hb = new TheHeaviestBall();
  //Algorithm validation
  if (hb.count > 3) {
   System.out.println("You can do better");
  } else {
   System.out.println("\nThe heaviest ball [ " + hb.theBALL() + " ] is the " + (hb.indexHeaviestBall + 1) + "th ball from the left");
  }
 }

 public static void main(String[] args) {
  getMyHeaviestBall();
 }
}
Friday, November 6, 2009
The 8 balls puzzle
Here is an interesting puzzle about selecting the heaviest ball among 7 other equally weighted balls. For example a collection of the 8 balls would look like this [2,1,1,1,1,1,1,1].
The goal is to choose the heaviest ball by performing only two weighings.
Fact: You know that all 7 other balls are equally weighted but you could not figure out the heaviest ball.
Solution: In order to do so, you are using the weighing machine but as a challenge you can only use the weighing machine at most twice
Update: Click here to view the solution to solve the 12 balls puzzle
import java.util.Random;

public class TheHeaviestBall {

 private int count = 0;
 private int indexHeaviestBall = 0;
 private Random myRand = new Random();
 private int[] balls = {1,1,1,1,1,1,1,1};
 private int[] arrangeBalls(){
  balls[myRand.nextInt(8)] = 2;
  for (int aBall : balls) {
   System.out.print(aBall + " ");
  }
  return balls;
 }

 public void weighingCount(){
  count++;
  if (count > 2) {
   System.out.println("Your algorithm fails");
  }
 }

 public int theBALL(){
  int myBalls[] = arrangeBalls();
  weighingCount();
  if ((myBalls[0]+myBalls[1]+myBalls[2]) > (myBalls[3]+myBalls[4]+myBalls[5])) {
   weighingCount();
   if (myBalls[1] == myBalls[2]) {
    indexHeaviestBall = 0;
    return myBalls[0];
   } else {
    if (myBalls[1] >= myBalls[2]) {
     indexHeaviestBall = 1;
     return myBalls[1];
    } else {
     indexHeaviestBall = 2;
     return myBalls[2];
    }
   }
  }
  else if ((myBalls[3]+myBalls[4]+myBalls[5]) > (myBalls[0]+myBalls[1]+myBalls[2])) {
   weighingCount();
   if (myBalls[4] == myBalls[5]) {
    return myBalls[3];
   } else {
    if (myBalls[4] >= myBalls[5]) {
     indexHeaviestBall = 4;
     return myBalls[4];
    }
    else {
     indexHeaviestBall = 5;
     return myBalls[5];
    }
   }
  }
  else {
   weighingCount();
   if (myBalls[6] >= myBalls[7]) {
    indexHeaviestBall = 6;
    return myBalls[6];
   }
   else {
    indexHeaviestBall = 7;
    return myBalls[7];
   }
  }
 }

 public static void getMyHeaviestBall(){
  TheHeaviestBall hb = new TheHeaviestBall();
  //Algorithm validation
  if (hb.count > 2) {
   System.out.println("You can do better");
  } else {
   System.out.println("\nThe heaviest ball [ " + hb.theBALL() + " ] is the " + (hb.indexHeaviestBall + 1) + "th ball from the left");
  }
 }

 public static void main(String[] args) {
  getMyHeaviestBall();
 }
}
Quizzie - my first Android application
Behold ... my very first fully functional Android application. The development process is very short. I always have this philosophy that if you know what you want to do and achieve, you will know what to do and how to achieve it. Therefore the design process is shortened.
This game is all about Mathematics. Seemingly simple mathematical expressions but good enough to induce carelessness to choose the wrong answer.
This game is all about Mathematics. Seemingly simple mathematical expressions but good enough to induce carelessness to choose the wrong answer.
Wednesday, November 4, 2009
Splunk in Movie Characters Timeline
These are the graphs that could be possibly (fictitiously) generated using Splunk to search for the characters in movies. Take a look at this: Click here to view the original source of the picture from xkcd.
 Click here to view the original source of the picture from xkcd.
Saying that something is wrong to someone
This is a hilarious way to express to someone if something is wrong. By the way if Cartman thinks that it is wrong, it must be really really wrong. :))
Monday, November 2, 2009
Sound Management in Android Application
This is a suggestion from myself about adjusting the volume of the sound effects or background music in your Android Activity(ies). The sample code is as below:onKeyDown method is called when a button is pressed and onKeyUp is called when the button is released. In this example specifically, we are raising and lowering the volumes when the volume keys are pressed and retain the values when the buttons are released.
Adding Vibration to your Android Application
Below are the simple steps to enable the vibration feature for your Android application. There are two things you will need to take care of - the AndroidManifest.xml file and the Vibrate class.
[1] Add this line in manifest file:
<?xml version="1.0" encoding="utf-8"?>
<manifest xmlns:android="http://schemas.android.com/apk/res/android"
. . .
. . .
. . .
<uses-permission android:name="android.permission.VIBRATE">permission>
</manifest>
[2] Add these two lines in your class definition.
[1] Add this line in manifest file:
<?xml version="1.0" encoding="utf-8"?>
<manifest xmlns:android="http://schemas.android.com/apk/res/android"
. . .
. . .
. . .
<uses-permission android:name="android.permission.VIBRATE">permission>
</manifest>
[2] Add these two lines in your class definition.
Saturday, October 31, 2009
Deploying Android package (.apk) into Mobile Device from Eclipse IDE
Feeling very frustrated trying to understand the deployment guidelines in the Android SDK website, I am writing this article to share my knowledge and experience in deploying Android applications from Eclipse into Android-powered mobile devices in Debug Mode to the readers who are also interested in developing Android applications. I have not explore the processes of signing an Android application for Public Release Mode, yet.
A major correction:
You can actually deploy your Android application without signing it in Debug Mode. Simply follow these steps and you are ready to test your application.
Things to do with the mobile device:
1. Press Menu button
2. Tap on Settings button
3. Tap on Applications in the menu
4. Put a check for Unknown Sources (to allow installation of non-Market applications)
5. Tap on Development (to set options for application development)
6. Put a check on USB debugging (to enable the Debug Mode when USB is connected)
7. Press Back button to go back to to the Settings menu
8. Plug your USB cable into the computer
Things to do with the console:
1. Go to the bin directory that places the APK file.
2. Type adb install

Optional:
You may do zipalign in the console if you wish to do so.
I hope this article is useful and informative enough for the Android developer community. Please leave your comments in the comments section if this does not work for you.
UPDATE: you may actually deploy your Android app by right-clicking at your project name. Select "Run As" and then click at "Android Application."
As simple as that. :)
Wednesday, October 28, 2009
Motorola Droid (Android 2.0)
The Droid looks fancy but I think any smartphones will look a lot more attractive with some shades of metallic coating or aluminum casing. This is the video from CNET showcasing Motorola Droid.
Search Assistant in Splunk 4
Being a software developer whose passion evolves about search, mobile applications and analytics and love to look at log files, I find that the most useful and technically attractive feature as I play along with the free version of Splunk> is the Search feature. It is so helpful that contextual suggestions will be given to you as you type your search phrases in the textfield. Initially I was completely clueless about how to perform a search.
The screenshots are as shown below. The top most image is the untouched search string. At first I was afraid to type anything into the textfield having the similar fear that Google might crash if we search for "google". Nah ... just kidding:P As a fail-safe software developer I assume that Splunk has an excellent exception handlings. However, I tried searching for the usage manual but I did not know how to search for it (for example the appropriate search strings to search for the manual and such). Imagine myself greeting you "Hi, this is Nicholas Key and I'm a software engineer. EEErrrggghhh..."
 This video provides you an excellent way to get started, in my opinion.
Update: Actually there is an introduction that teaches you how to use the Search feature but I overlooked it. Instead of clicking at Getting Started, I clicked at *NIX. You may find a brief explanation about using various techniques to perform search. Screenshots are as below:

The screenshots are as shown below. The top most image is the untouched search string. At first I was afraid to type anything into the textfield having the similar fear that Google might crash if we search for "google". Nah ... just kidding:P As a fail-safe software developer I assume that Splunk has an excellent exception handlings. However, I tried searching for the usage manual but I did not know how to search for it (for example the appropriate search strings to search for the manual and such).
 Imagine myself greeting you "Hi, this is Nicholas Key and I'm a software engineer. EEErrrggghhh..."
 This video provides you an excellent way to get started, in my opinion.
Update: Actually there is an introduction that teaches you how to use the Search feature but I overlooked it. Instead of clicking at Getting Started, I clicked at *NIX. You may find a brief explanation about using various techniques to perform search. Screenshots are as below:


My Java codes in Python (Part 3)
Prologue: I feel like making a tag cloud for the labels of my articles ;)
Tuesday, October 27, 2009
Another Web Journal Success (my personal minor achievement)
Web Journal is ranked top in Korean language for blog search. I can understand some Korean words and if I'm not mistaken, the Korean words in the header area literally means "Blog".


Splunk> User Interface
Here I am at the login page of Splunk>. The username/password is admin/changeme by default. You will have to click at the "First time signing in?" link to get the clue ;)
I think that the UI is really welcoming and slick. The snapshot is as below.
Since I feel like first trying out the *NIX application, I'll have to enable the feature before launching it. Even the AJAX powered loading modal looks impressive. Don't believe me? Take a look at it yourself :)


I think that the UI is really welcoming and slick. The snapshot is as below.

Since I feel like first trying out the *NIX application, I'll have to enable the feature before launching it. Even the AJAX powered loading modal looks impressive. Don't believe me? Take a look at it yourself :)


Trying out Splunk> 4.0.5 build 69401
This is my first time trying out an intelligent application that helps you monitor the content of your log files. Let's see how much I progress being a new user installing this application.
[1] Downloading a copy of Splunk>
This is the URL if you want to try out the free version of Splunk>. There are many choices of platforms for you to choose. I chose the MacOS 10.5 version and downloaded the DMG file. The version that I downloaded when I first wrote this article is splunk-4.0.5-69401-macosx-10.5-universal.dmg
[2] Installing Splunk>
If you are stumped trying to install Splunk>, there is a wiki page at your convenience. Click here to take a look at their help page and then select the appropriate version of the copy you downloaded. I clicked at version 4.0.5 and selected the link that guides me how to install it into my computer.
[3] Installation steps
The installation was a breeze until I wanted to launch it. According to the manual, I'll have to type this out $INSTALLATION_DIRECTORY/bin/splunk start. It did not work but I had this "gotcha" moment and did a ./splunk start and it worked just fine. You do not actually need to do $INSTALLATION_DIRECTORY/bin/splunk start --accept-license because you'll have to agree with the agreement during the installation by typing y (the second picture illustrates that).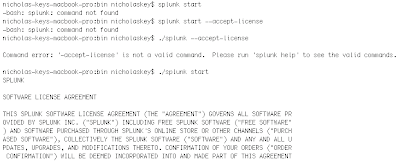

[4] Installation process completed
I was shown these lines at the bottom of the output:
If you get stuck, we're here to help.
Look for answers here: http://www.splunk.com/base/Documentation
The Splunk web interface is at http://nicholas-keys-macbook-pro.local:8000
[5] There's no step 5 :P
Just kidding. The fifth step is to start exploring the features of Splunk> and understand why it is good as how people claim it is. Splunk's themes are very catchy and I particularly like this theme "Finding your faults just like mum". Sample snapshot of Splunk> in my browser is shown below.
[1] Downloading a copy of Splunk>
This is the URL if you want to try out the free version of Splunk>. There are many choices of platforms for you to choose. I chose the MacOS 10.5 version and downloaded the DMG file. The version that I downloaded when I first wrote this article is splunk-4.0.5-69401-macosx-10.5-universal.dmg

[2] Installing Splunk>
If you are stumped trying to install Splunk>, there is a wiki page at your convenience. Click here to take a look at their help page and then select the appropriate version of the copy you downloaded. I clicked at version 4.0.5 and selected the link that guides me how to install it into my computer.

[3] Installation steps
The installation was a breeze until I wanted to launch it. According to the manual, I'll have to type this out $INSTALLATION_DIRECTORY/bin/splunk start. It did not work but I had this "gotcha" moment and did a ./splunk start and it worked just fine. You do not actually need to do $INSTALLATION_DIRECTORY/bin/splunk start --accept-license because you'll have to agree with the agreement during the installation by typing y (the second picture illustrates that).


[4] Installation process completed
I was shown these lines at the bottom of the output:
If you get stuck, we're here to help.
Look for answers here: http://www.splunk.com/base/Documentation
The Splunk web interface is at http://nicholas-keys-macbook-pro.local:8000
[5] There's no step 5 :P
Just kidding. The fifth step is to start exploring the features of Splunk> and understand why it is good as how people claim it is. Splunk's themes are very catchy and I particularly like this theme "Finding your faults just like mum". Sample snapshot of Splunk> in my browser is shown below.

CustomStack upgrades
My CustomStack now comes with several other new features. I can actually check if an Object exists in the Stack. Once the Object is found, a boolean true is returned. In addition to that, I've also added a method to retrieve an element with a given 0-based index number. I call it elementAt and it has a similar functionality of get. To the readers who are accustomed to the methods of a Stack, I have also added the method peek. Basically, it's a method to retrieve the element at the top of the Stack. The method search returns the 0-based index number of the first found element and -1 is returned if the element is not found. Here are the summary of methods of the newly improved CustomStack:
contains(Object input)
elementAt(int index)
peek()
search(Object input)
Below is the code snippet.
contains(Object input)
elementAt(int index)
peek()
search(Object input)
Below is the code snippet.
Click here to view the previous code of CustomStack.
 public boolean contains(Object input){
  boolean found = false;
  if(empty()){
   throw new RuntimeException( "Stack is already empty. No elements to check." );
  }
  for(int i = 0; i<size(); i++) {
   if (stackElements[i].hashCode() == input.hashCode()) {
    found = true;
    break;
   }
  }
  return found;
 }

 public Object elementAt(int index){
  return get(index);
 }

 public Object peek(){
  return top();
 }

 public int search(Object input){
  int index = -1;
  if(empty()){
   throw new RuntimeException( "Stack is already empty. No elements to search." );
  }
  for(int i = 0; i<size(); i++) {
   if (stackElements[i].hashCode() == input.hashCode()) {
    index = i;
    break;
   }
  }
  return index;
 }
Monday, October 26, 2009
Stack Implementation in Java
Below is my code to implement Stack from ground-up. I tried (in a very short time) to emulate the behavior of Stack in the Java Util package. The methods I have written are:
size()
get(int index)
empty()
clear()
pop()
push(Object input)
bottom()
top()
I call my Stack implementation as CustomStack as it may evolve over time. I have also provided some test cases to validate that the implementation actually works. The sample output is shown below the codes.
size()
get(int index)
empty()
clear()
pop()
push(Object input)
bottom()
top()
I call my Stack implementation as CustomStack as it may evolve over time. I have also provided some test cases to validate that the implementation actually works. The sample output is shown below the codes.
import java.lang.reflect.Array;

public class CustomStack {

 private Object[] stackElements;
 private int stackIndex = -1;
 private int stackSize = 0;
 private static final int INIT_SIZE = 3;
 private boolean stackSizeGiven = false;
 private int sizeHolder = 0;

 public CustomStack(){
  stackElements = new Object[ INIT_SIZE ];
  stackSizeGiven = false;
 }

 public CustomStack(int inputSize){
  sizeHolder = inputSize;
  stackElements = new Object[ sizeHolder ];
  stackSizeGiven = true;
 }

 public int size(){
  return stackSize;
 }

 public Object get(int index){
  if ((index < 0) || (index > (stackSize))) {
   throw new RuntimeException("Index out of bound. Supplied " + index);
  }
  return stackElements[ index ];
 }

 public boolean empty() {
  return stackIndex == -1;
 }

 public void clear() {
  if (stackSizeGiven) {
   stackElements = new Object[ sizeHolder ];
  } else {
   stackElements = new Object[ INIT_SIZE ];
  }
  stackIndex = -1;
  stackSize = 0;
 }

 public void pop() {
  if(empty()){
   throw new RuntimeException( "Stack is already empty. No elements to pop." );
  }
  stackIndex--;
  stackSize--;
 }

 public void push(Object input) {
  if( stackIndex + 1 == stackElements.length ) {
   int arrayLength = Array.getLength(stackElements);
   Object [] newArray = (Object[]) Array.newInstance(stackElements.getClass().getComponentType(), (arrayLength + arrayLength ));
   System.arraycopy(stackElements, 0, newArray, 0, arrayLength);
   stackElements = newArray;
  }
  stackElements[ ++stackIndex ] = input;
  stackSize++;
 }

 public Object bottom(){
  if(empty())
   throw new RuntimeException( "Stack is already empty. No elements at bottom." );
  return stackElements[ 0 ];
 }

 public Object top() {
  if(empty())
   throw new RuntimeException( "Stack is already empty. No elements at top." );
  return stackElements[ stackIndex ];
 }

 public static void testCases(){
  CustomStack aStack = new CustomStack();
  System.out.println("Stack is empty: " + aStack.empty());
  aStack.push("Nicholas Key");
  aStack.push(3.142);
  aStack.push(false);
  // Prints false
  System.out.println("Element at top of Stack: " + aStack.top());
  System.out.println("Size of current Stack: " + aStack.size());

  aStack.push("Java Developer");
  aStack.push("Android App Developer");
  // Prints Android App Developer
  System.out.println("Element at top of Stack: " + aStack.top());

  aStack.push("Web App Developer");
  aStack.push("Blogger");
  aStack.push(2009);
  // Prints 2009
  System.out.println("Element at top of Stack: " + aStack.top());
  System.out.println("Size of current Stack: " + aStack.size());

  // Prints Stack elements
  for (int i= 0; i< aStack.size(); i++) {
   System.out.println("Index " + i + ": " + aStack.get(i));
  }

  // Pops 2009
  aStack.pop();
  // Prints Blogger
  System.out.println("Element at top of Stack: " + aStack.top());

  // Pops Blogger
  aStack.pop();
  // Prints Web App Developer
  System.out.println("Element at top of Stack: " + aStack.top());

  // Prints Stack elements
  for (int i= 0; i< aStack.size(); i++) {
   System.out.println("Index " + i + ": " + aStack.get(i));
  }

  System.out.println("Element at bottom of Stack: " + aStack.bottom());

  // Pops out all Stack elements
  aStack.clear();
  System.out.println("Stack is empty: " + aStack.empty());

  System.out.println(aStack.get(1));

  System.out.println(aStack.get(aStack.size() + 300));
 }

 public static void main(String[] args) {
  testCases();
 }
}
Update: I've added several methods to make my CustomStack more robust ;) Click here to look at the improvements.
Stack is empty: true
Element at top of Stack: false
Size of current Stack: 3
Element at top of Stack: Android App Developer
Element at top of Stack: 2009
Size of current Stack: 8
Index 0: Nicholas Key
Index 1: 3.142
Index 2: false
Index 3: Java Developer
Index 4: Android App Developer
Index 5: Web App Developer
Index 6: Blogger
Index 7: 2009
Element at top of Stack: Blogger
Element at top of Stack: Web App Developer
Index 0: Nicholas Key
Index 1: 3.142
Index 2: false
Index 3: Java Developer
Index 4: Android App Developer
Index 5: Web App Developer
Element at bottom of Stack: Nicholas Key
Stack is empty: true
Exception in thread "main" java.lang.RuntimeException: Index out of bound. Supplied 1
 at CustomStack.get(CustomStack.java:29)
 at CustomStack.testCases(CustomStack.java:128)
 at CustomStack.main(CustomStack.java:136)
Sunday, October 25, 2009
What happens when you type in a URL into the browser ...
These are the processes taken place.
[Immense credits to EXPRESS HOST PRO for the detailed explanation]
 Step 1: Request a record
You begin by asking your computer to resolve a hostname, such as visiting 'http://www.google.com' in a web browser. The first place your computer looks is its local DNS cache, which stores DNS information that the computer has recently retrieved.
Step 2: Ask the Recursive DNS servers
If the records are not stored locally, your computer queries (or contacts) your ISP's recursive DNS servers. These machines perform the legwork of DNS queries on behalf of their customers. The recursive DNS servers have their own caches, which they check before continuing with the query.
Step 3: Ask the Root DNS servers
If the recursive DNS servers do not have the record cached, they contact the root nameservers. These thirteen nameservers contain pointers for all of the Top-Level Domains (TLDs), such as '.com', '.net' and '.org'. If you are looking for 'www.google.com.', the root nameservers look at the TLD for the domain - 'www.google.com'- and direct the query to the TLD DNS nameservers responsible for all '.com' pointers.
Step 4: Ask the TLD DNS servers
The TLD DNS servers do not store the DNS records for individual domains; instead, they keep track of the authoritative nameservers for all the domains within their TLD. The TLD DNS servers look at the next part of the query from right to left - 'www.google.com' - then direct the query to the authoritative nameservers for 'google.com'.
Step 5: Ask the Authoritative DNS servers
Authoritative nameservers contain all of the DNS records for a given domain, such as host records (which store IP addresses), MX records (which identify nameservers for a domain), and so on. Since you are looking for the IP address of 'www.google.com', the recursive server queries the authoritative nameservers and asks for the host record for 'www.google.com'.
Step 6: Retrieving the record
The recursive DNS server receives the host record for 'www.google.com' from the authoritative nameservers, and stores the record in its local cache. If anyone else requests the host record for 'www.google.com', the recursive servers will already have the answer, and will not need to go through the lookup process again until the record expires from cache.
Step 7: The Answer!
Finally, the recursive server gives the host record back to your computer. Your computer stores the record in its cache, reads the IP address from the record, then passes this information to the web browser. Your browser then opens a connection to the IP address '72.14.207.99' on port 80 (for HTTP), and our webserver passes the web page to your browser, which displays Google.
You may visit the original content at this URL.
Here's my understanding to the processes:
We type in a URL and hit GO.
The browser translates the URL into an IP address.
In order to do that, the browser contacts DNS to resolve the IP address.
The browser checks if the IP address is cached.
If not, it makes a DNS query to my ISP's DNS server.
DNS replies back with the IP address of the site.
Browser opens TCP connection to the server at port 80.
Displays the content in browser.
Stores the IP address in the DNS cache for future use.
When the browser is closed, TCP connection is terminated.
The HTTP request being made is a GET request.
Correct me if I'm wrong.
Saturday, October 24, 2009
Steve Ballmer on Windows 7
Tell me you are not seeing the MacBook Pro at the big LCD screen. While it is true that you can actually operate Windows on a Mac provided that you installed VMware, I really think that one of the many other OEM brands is more appropriate to be shown in that big screen.
 Take a look at Steve's face when he is holding the Dell Adamo XPS notebook. I guess he must be thinking "Why is this guy shoving a MacBook Air to me? I feel like snapping this notebook into halves. It reminds me ths fragility of the Air!" Look at his face again :) Priceless! :P
Pictures are attributed to NBC.
Friday, October 23, 2009
Sorting Algorithms (Bubble sort, Selection sort & Insertion Sort)
I want to refresh my mind about sorting algorithms and here are the first three simple sorting algorithms in this article - Bubble Sort, Selection Sort and Insertion Sort. I attribute the explanations to Wikipedia.
import java.util.Random;

public class SortingAlgorithm {

 private final int SIZE = 2000;
 private Random myRand = new Random();
 private int[] numbers = new int[SIZE];

 public SortingAlgorithm(){}

 private void randomizeNumbers(){
  for (int i = 0; i < numbers.length; i++) {
   numbers[i] = myRand.nextInt( 2000 ) + 1;
  }
 }

 private void printArray(){
  for(int i: numbers){
   System.out.print(i + " ");
  }
  System.out.println();
 }

 public void bubbleSort() {
  randomizeNumbers();
  System.out.println("BUBBLE SORT");
  System.out.println("Presorted numbers: ");
  printArray();
  long start = System.nanoTime();

  /**
   * Bubblesort algorithm
   * Wikipedia:
   * works by repeatedly stepping through the list to be sorted,
   * comparing each pair of adjacent items and swapping them if
   * they are in the wrong order. The pass through the list is
   * repeated until no swaps are needed, which indicates that the
   * list is sorted. The algorithm gets its name from the way smaller
   * elements "bubble" to the top of the list.
   * Complexity:
   * Worst = O(n^2)
   * Average = O(n^2)
   * Best = O(n)
   */
  int n = numbers.length;
  for (int pass=1; pass < n; pass++) {
   for (int i=0; i < n-pass; i++) {
    if (numbers[i] > numbers[i+1]) {
     int temp = numbers[i];
     numbers[i] = numbers[i+1];
     numbers[i+1] = temp;
    }
   }
  }

  long elapsed = (System.nanoTime() - start);
  System.out.println("Bubble-sorted numbers: ");
  printArray();
  System.out.println("Elapsed time: " + elapsed + "ns\n");
 }

 public void selectionSort(){
  randomizeNumbers();
  System.out.println("SELECTION SORT");
  System.out.println("Presorted numbers: ");
  printArray();
  long start = System.nanoTime();

  /**
   * Selectionsort Algoritm
   * Wikipedia:
   * 1. Find the minimum value in the list
   * 2. Swap it with the value in the first position
   * 3. Repeat the steps above for the remainder of the list (starting
   *    at the second position and advancing each time)
   * Complexity:
   * Worst = O(n^2)
   * Average = O(n^2)
   * Best = O(n^2)
   */
  for (int i=0; i<numbers.length-1; i++) {
   int minIndex = i;
   for (int j=i+1; j<numbers.length; j++) {
    if (numbers[minIndex] > numbers[j]) {
     minIndex = j;
    }
   }
   if (minIndex != i) {
    int temp = numbers[i];
    numbers[i] = numbers[minIndex];
    numbers[minIndex] = temp;
   }
  }

  long elapsed = (System.nanoTime() - start);
  System.out.println("Selection-sorted numbers: ");
  printArray();
  System.out.println("Elapsed time: " + elapsed + "ns\n");
 }

 public void insertionSort(){
  randomizeNumbers();
  System.out.println("INSERTION SORT");
  System.out.println("Presorted numbers: ");
  printArray();
  long start = System.nanoTime();

  /**
   * Insertionsort Algorithm
   * Wikipedia:
   * much less efficient on large lists than more advanced algorithms
   * such as quicksort, heapsort, or merge sort. However, insertion sort
   * provides several advantages:
   * 1. simple implementation
   * 2. efficient for (quite) small data sets
   * 3. adaptive, i.e. efficient for data sets that are already substantially
   *    sorted: the time complexity is O(n + d), where d is the number of inversions
   * 4. more efficient in practice than most other simple quadratic (i.e. O(n^2)) algorithms
   *    such as selection sort or bubble sort
   * Complexity:
   * Worst = O(n^2)
   * Average = O(n^2)
   * Best = O(n)
   */
  int in, out;
  for(out=1; out<numbers.length; out++){
   int temp = numbers[out];
   in = out;
   while(in>0 && numbers[in-1] >= temp){
    numbers[in] = numbers[in-1];
    --in;
   }
   numbers[in] = temp;
  }

  long elapsed = (System.nanoTime() - start);
  System.out.println("Insertion-sorted numbers: ");
  printArray();
  System.out.println("Elapsed time: " + elapsed + "ns\n");
 }

 public static void main(String[] args) {
  SortingAlgorithm sa = new SortingAlgorithm();
  sa.bubbleSort();
  sa.selectionSort();
  sa.insertionSort();
 }
}
Thursday, October 22, 2009
Web Journal's Ranking in Google Blog Search
Tell me you would be very happy if you are a blogger yourself and your blog is ranked top in the search result. I am thrilled to see this ;) Thanks to all the readers who make this possible.

Mirror by Jonas
This is a very special segment of my blog because I'm helping a reader of my blog to promote his API about Java Reflection. Many thanks to Jonas for coming up with such convenient API. You may take a look at his project "Mirror" at this link.
 I would want to liken this Mirror API it to using Velocity to generate dynamic HTML in a sense that it eases your coding complexity.
 I would want to liken this Mirror API it to using Velocity to generate dynamic HTML in a sense that it eases your coding complexity.
Wednesday, October 21, 2009
Traversing Folder and Files
Here is an updated code to inform you if the file or folder specified does not exists. You may take a look at the original code at this article.
 public void traverseFilesFolders () {
  if (referencedFile.exists()) {
   traverseFilesFolders(referencedFile);
  } else {
   System.out.println("File or Folder does not exist");
  }
 }
Final vs Finally vs Finalize
A short note for myself:
Final: used for defining a class non-subclassable, and making a member variable as a
constant which cannot be modified, and declare a method non-overridable.
Finally: to provide the capability to execute code no matter whether or
not an exception is thrown or caught in the try-catch exception handler.
Finalize: helps in garbage collection to clean up objects that are no longer required. Usualy Java will do the garbage collection automatically.
Monday, October 19, 2009
Java Reflection
The Reflection API allows the user to get the complete, but not limited to, information about classes, constructors, interfaces and methods that are being used. There are many things we can achieve with this API and the methods are:
getInterfaces()
getName()
getClass()
getSuperclass()
getMethods()
getFields()
getConstructors()
getInterfaces()
getName()
getClass()
getSuperclass()
getMethods()
getFields()
getConstructors()
The output of the code is as follow. Nothing fancy, nothing complicated. Everything is straightforward.
import java.lang.reflect.Constructor;
import java.lang.reflect.Field;
import java.lang.reflect.Method;

public class ReflectionTool {

 private static final String padding = "\t";

 public void retrieveInterfaces(){
  System.out.println("Retrieve Interface(s):");
  for (Class anInterface: java.util.Date.class.getInterfaces()) {
   System.out.println(padding + anInterface);
  }
 }

 public void retrieveName(){
  System.out.println("Retrieve Name of Class:");
     System.out.println(padding + java.util.concurrent.atomic.AtomicInteger.class.getName());
 }

 public void retrieveClass(){
  System.out.println("Retrieve Runtime Class:");
  System.out.println(padding + java.util.zip.CRC32.class.getClass());
 }

 public void retrieveSuperClass(){
  System.out.println("Retrieve Superclass:");
  System.out.println(padding + java.util.zip.CRC32.class.getClass().getSuperclass());
 }

 public void retrieveMethods(){
  System.out.println("Retrieve Methods:");
  for (Method aMethod: java.util.List.class.getMethods()) {
   System.out.println(padding + aMethod);
  }
 }

 public void retrieveFields(){
  System.out.println("Retrieve Fields:");
  for (Field aField: java.lang.Double.class.getFields()) {
   System.out.println(padding + aField);
  }
 }

 public void retrieveConstructors(){
  System.out.println("Retrieve Constructors:");
  for (Constructor aConstructor: java.lang.Double.class.getConstructors()) {
   System.out.println(padding + aConstructor);
  }
 }

 public static void main(String[] args) {
  ReflectionTool rt = new ReflectionTool();
  rt.retrieveInterfaces();
  rt.retrieveName();
  rt.retrieveClass();
  rt.retrieveSuperClass();
  rt.retrieveMethods();
  rt.retrieveFields();
  rt.retrieveConstructors();
 }
}
Retrieve Interface(s):
 interface java.io.Serializable
 interface java.lang.Cloneable
 interface java.lang.Comparable
Retrieve Name of Class:
 java.util.concurrent.atomic.AtomicInteger
Retrieve Runtime Class:
 class java.lang.Class
Retrieve Superclass:
 class java.lang.Object
Retrieve Methods:
 public abstract int java.util.List.hashCode()
 public abstract boolean java.util.List.equals(java.lang.Object)
 public abstract java.lang.Object java.util.List.get(int)
 public abstract boolean java.util.List.add(java.lang.Object)
 public abstract void java.util.List.add(int,java.lang.Object)
 public abstract int java.util.List.indexOf(java.lang.Object)
 public abstract void java.util.List.clear()
 public abstract int java.util.List.lastIndexOf(java.lang.Object)
 public abstract boolean java.util.List.contains(java.lang.Object)
 public abstract boolean java.util.List.addAll(java.util.Collection)
 public abstract boolean java.util.List.addAll(int,java.util.Collection)
 public abstract int java.util.List.size()
 public abstract java.lang.Object[] java.util.List.toArray()
 public abstract java.lang.Object[] java.util.List.toArray(java.lang.Object[])
 public abstract java.util.Iterator java.util.List.iterator()
 public abstract java.lang.Object java.util.List.set(int,java.lang.Object)
 public abstract boolean java.util.List.remove(java.lang.Object)
 public abstract java.lang.Object java.util.List.remove(int)
 public abstract boolean java.util.List.isEmpty()
 public abstract boolean java.util.List.containsAll(java.util.Collection)
 public abstract boolean java.util.List.removeAll(java.util.Collection)
 public abstract boolean java.util.List.retainAll(java.util.Collection)
 public abstract java.util.List java.util.List.subList(int,int)
 public abstract java.util.ListIterator java.util.List.listIterator()
 public abstract java.util.ListIterator java.util.List.listIterator(int)
Retrieve Fields:
 public static final double java.lang.Double.POSITIVE_INFINITY
 public static final double java.lang.Double.NEGATIVE_INFINITY
 public static final double java.lang.Double.NaN
 public static final double java.lang.Double.MAX_VALUE
 public static final double java.lang.Double.MIN_VALUE
 public static final int java.lang.Double.SIZE
 public static final java.lang.Class java.lang.Double.TYPE
Retrieve Constructors:
 public java.lang.Double(double)
 public java.lang.Double(java.lang.String) throws java.lang.NumberFormatException
Friday, October 16, 2009
Traversing Folders and Files Recursively
Both files and folders are represented as File object in the java.io package. We are recognizing if an object is a file by using the method "isFile()" and a folder with the method "isDirectory()".
There are many interesting things you can do with the example shown. You may add a few lines of codes to compile a list of files of a specific file extension, for example ".txt" or ".class".
import java.io.File;

public class FilesFoldersTraversal {

 private final char SEPARATOR = File.separatorChar;
 private File originalFile;
 private File referencedFile;
 private String pad = null;
 private String absolutePathOriginalFile = null;

 public FilesFoldersTraversal(String inputFileString) {
  File inputFile = new File(inputFileString);
  originalFile = inputFile;
  referencedFile = inputFile;
  absolutePathOriginalFile = originalFile.getAbsolutePath();
 }

 public void traverseFilesFolders () {
  traverseFilesFolders(referencedFile);
 }

 private void traverseFilesFolders(File referencedFile){
  if (referencedFile.isDirectory()){
   pad = getPadding(referencedFile);
   processFolders(referencedFile);
  }
  else if (referencedFile.isFile()){
   processFiles(referencedFile);
  }
 }

 private void processFolders(File referencedFile){
  System.out.println(pad + "Folder: " + referencedFile.getName());
  File listFiles[] = referencedFile.listFiles();
  for(File singleFile : listFiles){
   traverseFilesFolders(singleFile);
  }
 }

 private void processFiles(File referencedFile){
  System.out.println(pad  + "  " + "File: " + referencedFile.getName());
 }

 private String getPadding(File referencedFile){
  String padding = "";
  String fileAbsolutePath = referencedFile.getAbsolutePath();
  String filePathSubString = fileAbsolutePath.substring(absolutePathOriginalFile.length(), fileAbsolutePath.length());

  int index = 0;
  int subStringLength = filePathSubString.length();
  while (index < subStringLength) {
   if (filePathSubString.charAt(index) == SEPARATOR){
    padding += "  ";
   }
   index++;
  }

  return padding;
 }

 public static void main(String[] args) {
  FilesFoldersTraversal fft = new FilesFoldersTraversal("/Users/YOUR_USER_NAME/Documents");
  fft.traverseFilesFolders();
 }

}
Thursday, October 8, 2009
MediaPlayer vs SoundPool
Here is my recommendation if you are not sure which class to use - MediaPlayer or SoundPool when developing an Android application.
MediaPlayer:
If you were to play a background music in your application, you should go for MediaPlayer. MediaPlayer is my preferred class because it allows you to playback a lengthy audio file.
SoundPool:
As the name explains itself, SoundPool class allows you to playback a collection of short sound effects quickly and it does not lag much. Imagine yourself writing a game with several sound effects meant for different actions. You may use a HashMap to compile the list of SFXs and then play it by accessing the index number (key in the HashMap).
Summary:
Notice the adjectives I used for different classes.
Lengthy, theme = MediaPlayer
Short, effect = SoundPool
Monday, October 5, 2009
Reading XML in Android platform
I find these XmlResourceParser and XmlPullParser classes useful to read XML files when we are dealing with Android platform. Below is the code sample I use in my Android project:Here is an example from the Android Developers website.
Detailed explanation of using XSL to scrape ISO country codes
I apologize if you couldn't understand how I managed to scrape the country codes from the ISO website as mentioned in my previous article. Here are the detailed steps to scrape the codes accordingly. You'll need 3 things to achieve the goal: manual editing (I know it's primitive otherwise you are more than welcomed to write your HTML tag stripper to recognize the elements in the web page), XML file and XSL file.
[1] Copy the table element:
- Copy the entire table element that contains the country names and codes
[2] Editing the XML file:
- Open an empty file
- Save it as "countries.xml"
- Add this line at the top of the XML file:
<?xml version="1.0" encoding="UTF-8"?>
<?xml-stylesheet type="text/xsl" href="countries.xsl"?>
- Paste the table element you copied earlier
- Remove the table row that contains "Country names" and "ISO 3166-1-alpha-2 code"
- The screenshot is as below: [3] Editing the XSL file:
- Copy the XPath codes I demonstrated in this article
- Save it as "countries.xsl"
[4] You are all set!
- Here is the sample output translating the XML using XPath
[1] Copy the table element:
- Copy the entire table element that contains the country names and codes
[2] Editing the XML file:
- Open an empty file
- Save it as "countries.xml"
- Add this line at the top of the XML file:
<?xml version="1.0" encoding="UTF-8"?>
<?xml-stylesheet type="text/xsl" href="countries.xsl"?>
- Paste the table element you copied earlier
- Remove the table row that contains "Country names" and "ISO 3166-1-alpha-2 code"
- The screenshot is as below:
 [3] Editing the XSL file:
- Copy the XPath codes I demonstrated in this article
- Save it as "countries.xsl"
[4] You are all set!
- Here is the sample output translating the XML using XPath

Wednesday, September 30, 2009
Maintain Layout Orientation in Android Applications
Here is a one-liner statement in your manifest xml (AndroidManifest.xml) to maintain your preferred portrait layout orientation. Simply add this line in the XML:
android:screenOrientation="portrait"
Otherwise, you may also use "landscape" as the value.
android:screenOrientation="landscape"
Further information is available at the Android Developers Website
android:screenOrientation="portrait"
Otherwise, you may also use "landscape" as the value.
android:screenOrientation="landscape"
Further information is available at the Android Developers Website

Tuesday, September 22, 2009
Tokenizing String Recursively
This is an update to the blog entry "String tokenizer by hand". In this article, I am demonstrating an example of tokenizing a given string in a recursive manner. The code is as below:
import java.util.ArrayList;
public class StringTokenizer {
private static ArrayListtokenizedStr = new ArrayList ();
private static StringBuffer str = new StringBuffer();
public static ArrayListtokenizer(String input){
int strLength = input.length();
return tokenizer(input, 0, strLength);
}
public static ArrayListtokenizer(String input, int currentIndex, int strLength){
if (currentIndex < strLength) {
char curr = input.charAt(currentIndex);
if (curr != ' ') {
str.append(curr);
} else {
if (str.length() != 0) {
tokenizedStr.add(str);
}
str = new StringBuffer();
}
if ((currentIndex == strLength-1 ) && (curr != ' ')) {
tokenizedStr.add(str);
}
currentIndex++;
tokenizer(input, currentIndex, strLength);
}
return tokenizedStr;
}
public static void main(String[] args) {
System.out.println(tokenizer(" Hello World This is Nicholas Key. How are you? "));
}
}

Wednesday, September 16, 2009
Venture Capitalists and Investors
This is an interesting video for us to ponder together and to reflect ourselves.
Tuesday, September 15, 2009
Android, iPhone, PalmOS
These are the screenshots of the desktop from three smartphones. From left to right: Android, iPhone and PalmOS. I personally prefer to write applications on Android simply because I'm familiar with Eclipse as the IDE and Java as the programming language, followed by iPhone simply because of the demand in the market and lastly, the PalmOS.


Sunday, September 13, 2009
Binary Tree and its popular methods
This is something convenient I think to do a brief revision on Binary Tree other than reading about it on Wikipedia. This implementation demonstrates the construction of binary tree with some elements and the typical methods related to it such as:
[1] Pre-Order Traversal
[2] In-Order Traversal
[3] Post-Order Traversal
[4] Getting the size of the binary tree
[5] Get the minimum value
[6] Get the maximum value
[7] Get root value
[8] Inserting new elements
My implementation does not include duplication of elements. You may copy the code and test it yourself.
import java.util.ArrayList;
import java.util.Collections;
import java.util.Random;
public class BinaryTree {
private static class TreeNode {
TreeNode left;
TreeNode right;
int nodeValue;
TreeNode(int data) {
left = null;
right = null;
nodeValue = data;
}
}
private TreeNode root;
public BinaryTree() {
root = null;
}
public void constructBinaryTreeHardCoded() {
root = null;
root = new TreeNode(6);
//root = insertData(root, 6);
root = insertData(root, 2);
root = insertData(root, 7);
root = insertData(root, 1);
root = insertData(root, 4);
root = insertData(root, 9);
root = insertData(root, 3);
root = insertData(root, 5);
root = insertData(root, 8);
}
public void testHarness(){
root = null;
Random rand = new Random();
int rootValue = rand.nextInt( 20 ) + 1;
root = new TreeNode(rootValue);
System.out.println("Random seeded root value: " + rootValue);
int numberOfNodes = rand.nextInt( 18 ) + 1;
System.out.println("Random number of children to be generated: " + numberOfNodes);
for (int i = 0; i < numberOfNodes; i++) {
int randValue = rand.nextInt( 30 ) + 1;
System.out.println("Inserting: " + randValue);
root = insertData(root, randValue);
}
}
public TreeNode insertData(TreeNode node, int data) {
if (node == null) {
node = new TreeNode(data);
} else {
if (data < node.nodeValue) {
if (node.left != null) {
node.left = insertData(node.left, data);
} else {
node.left = new TreeNode(data);
System.out.println("Inserted " + data + " to the left of " + node.nodeValue);
}
} else if (data > node.nodeValue) {
if (node.right != null) {
node.right = insertData(node.right, data);
} else {
node.right = new TreeNode(data);
System.out.println("Inserted " + data + " to the right of " + node.nodeValue);
}
} else {
System.out.println("Not inserting " + data + " because it already exists in the tree");
}
}
return(node);
}
public boolean isIdenticalTree(BinaryTree comparedTree) {
return (isIdenticalTree(root, comparedTree.root));
}
private boolean isIdenticalTree(TreeNode first, TreeNode second) {
if (first == null && second == null) {
return true;
} else if (first != null && second != null) {
return (
first.nodeValue == second.nodeValue &&
isIdenticalTree(first.left, second.left) &&
isIdenticalTree(first.right, second.right)
);
} else {
return false;
}
}
public int getSize() {
return(setSize(root));
}
private int setSize(TreeNode node) {
if (node == null) {
return 0;
} else {
return(setSize(node.left) + 1 + setSize(node.right));
}
}
public void printTreeTraversal() {
System.out.print("Inorder Traversal: ");
printInOrder(root);
System.out.print("\nPreorder Traversal: ");
printPreOrder(root);
System.out.print("\nPostorder Traversal: ");
printPostOrder(root);
System.out.println();
}
private void printInOrder(TreeNode node) {
if (node == null) {
return;
}
printInOrder(node.left);
visitTreeNode(node);
printInOrder(node.right);
}
private void printPreOrder(TreeNode node) {
if (node == null) {
return;
}
visitTreeNode(node);
printPreOrder(node.left);
printPreOrder(node.right);
}
private void printPostOrder(TreeNode node) {
if (node == null) {
return;
}
printPostOrder(node.left);
printPostOrder(node.right);
visitTreeNode(node);
}
private void visitTreeNode(TreeNode node){
System.out.print(node.nodeValue + " ");
}
public int getMinValue() {
return (getMinValue(root));
}
private int getMinValue(TreeNode node) {
while (node.left != null) {
node = node.left;
}
return (node.nodeValue);
}
public int getMaxValue() {
return (getMaxValue(root));
}
private int getMaxValue(TreeNode node) {
while (node.right != null) {
node = node.right;
}
return (node.nodeValue);
}
public int getMaxDepth() {
int depth = getMaxDepth(root);
return ((depth > 0) ? (depth - 1) : 0);
}
private int getMaxDepth(TreeNode node) {
if (node == null) {
return 0;
} else {
int leftDepth = getMaxDepth(node.left);
int rightDepth = getMaxDepth(node.right);
return (((leftDepth > rightDepth) ? leftDepth : rightDepth) + 1);
}
}
public boolean containsData(int data) {
return(containsData(root, data));
}
private boolean containsData(TreeNode node, int data) {
if (node == null) {
return false;
}
if (data == node.nodeValue) {
return true;
} else if (data < node.nodeValue) {
return(containsData(node.left, data));
} else {
return(containsData(node.right, data));
}
}
public int getRootValue(){
return root.nodeValue;
}
public boolean containsSumInPath(int total) {
return( containsSumInPath(root, total) );
}
private boolean containsSumInPath(TreeNode node, int total) {
if (node == null) {
return(total == 0);
} else {
int remainder = total - node.nodeValue;
if (containsSumInPath(node.left, remainder) || containsSumInPath(node.right, remainder)) {
addPaths( remainder, node.nodeValue, total);
}
return(containsSumInPath(node.left, remainder) || containsSumInPath(node.right, remainder));
}
}
private ArrayListpath = new ArrayList ();
private void addPaths(int remainder, int currentNodeValue, int total){
if (!path.contains(currentNodeValue)) {
path.add(currentNodeValue);
}
}
public ArrayListgetSumOfPath(){
Collections.reverse(path);
return path;
}
public static void main(String[] args) {
BinaryTree bTree1 = new BinaryTree();
BinaryTree bTree2 = new BinaryTree();
bTree1.constructBinaryTreeHardCoded();
System.out.println("Size of the binary tree: " + bTree1.getSize());
System.out.println("Root value in the binary tree: " + bTree1.getRootValue());
System.out.println("Smallest value in the binary tree: " + bTree1.getMinValue());
System.out.println("Largest value in the binary tree: " + bTree1.getMaxValue());
System.out.println("Maximum depth of the binary tree: " + bTree1.getMaxDepth());
System.out.println("Contains node value 4: " + bTree1.containsData(4));
System.out.println("Path has sum of 30: " + bTree1.containsSumInPath(30) + " = " + bTree1.getSumOfPath());
bTree1.printTreeTraversal();
System.out.println();
bTree2.testHarness();
System.out.println("Size of the binary tree: " + bTree2.getSize());
System.out.println("Root value in the binary tree: " + bTree2.getRootValue());
System.out.println("Smallest value in the binary tree: " + bTree2.getMinValue());
System.out.println("Largest value in the binary tree: " + bTree2.getMaxValue());
System.out.println("Maximum depth of the binary tree: " + bTree2.getMaxDepth());
System.out.println("Contains node value 11: " + bTree2.containsData(11));
Random rand = new Random();
int find = rand.nextInt( 30 ) + 1;
System.out.println("Path has sum of "+ find +": " + bTree2.containsSumInPath(find) + " = " + bTree2.getSumOfPath());
bTree2.printTreeTraversal();
System.out.println("Are identical binary trees: " + bTree1.isIdenticalTree(bTree2));
System.out.println("\nChanged elements in binary tree");
bTree2.constructBinaryTreeHardCoded();
System.out.println("Are identical binary trees: " + bTree1.isIdenticalTree(bTree2));
}
}
Subscribe to:
Posts (Atom)

